These are the supplies you'll need for the hangers, suitable wire of course, a block of scrap wood, different size dowels, a pin vise with drill bits or an electric drill, glue, knife to cut the dowels, snips for the wire and small smooth nosed pliers(sorry, forgot to put them in the photo.
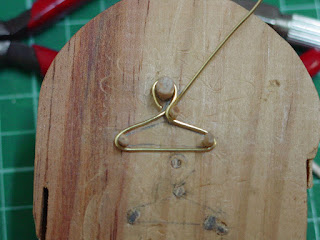
Draw the shape you want your hanger to be on your block of wood allowing for the thickness of the wire. Drill holes as you can see in the photo to insert the dowels, cut dowels to length and glue in the holes. Leave to dry at least 24 hours for full strength or they might move when you put pressure on them.
Cut about 4" of wire and start bending from the hook end.
Continue bending till you are back where you started from. Slip the wire off the jig and push the end of the wire behind the neck of the hook, slip back on and check your shape is ok, bend the end of the wire up a little and then slip the hanger back off to finish.
Fold the wire around the neck making sure you keep the shape. Nip off the wire leaving a tiny stub, pinch that down tight with your pliers.
Snip off the hook and file it smooth. You might need to tweak the shape a bit with your pliers. These are baby size hangers, the hook looks a trifle large because the hanging rail in the white wardrobe is perhaps a bit thicker than it could have been but when clothes are hanging on the hangers they look ok.


.jpg)


.jpg)


